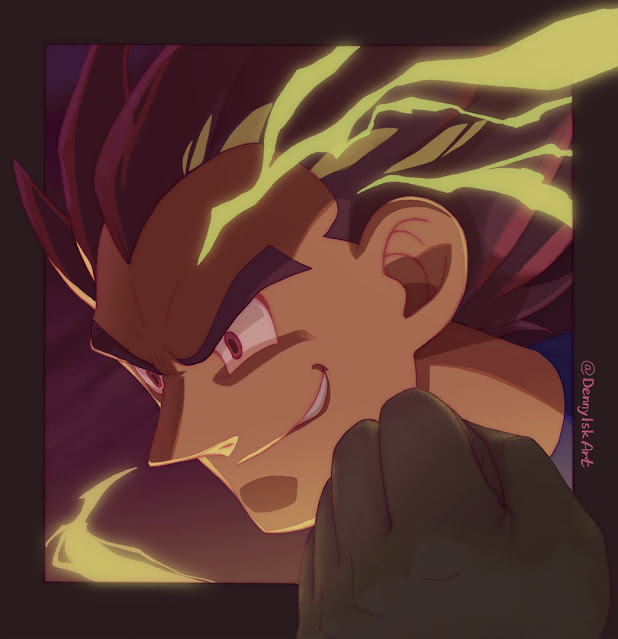
I am opening a commission service. While preparing the commission sheet, I was surprised that I found only one artwork for "Bust" example. So why not draw a bust sample? It should be fun and easy.
 |
| Final painting |
I wanted an image of Vegeta from Dragon Ball Z. It should give you an idea how I draw well-known character using my style. Sketching the thumbnails was more difficult than I expected. The pieces I had fun with (#1 & #4) were the ones in which I exaggerated Vegeta being cunning/evil rather than making him sympathetic.
 |
| Thumbnails |
As the make-believe client, I picked thumbnail #4. I like the exaggerated cruel grin.
I then proceeded to draw the image in actual size: the square is 17 x 17 cm (around 6.7 x 6.7 inches).
 |
| Pencil round 1 |
The client side of me thought I could push the drawing further, so I did. I enlarged the fist to add more depth to the image. The electric arcs hopefully added some interest.
 |
| Pencil round 2 |
And here is the inked drawing.
 |
| Inked drawing |
The next stage is coloring. I started with rough color thumbnails. I used different dominant colors to try out different atmospheres:
- #1 is Super Saiyan Blue look.
- #2 is classic Super Saiyan look.
- #3 is Super Saiyan God look. The hair color in this form is reddish black, so I went for complementary green background.
- #4 is combination of #2 and #3.
 |
| Color thumbnails |
I had difficulty choosing. Of course my numbering above hints at my choice; but it was not clear during the process. I personally prefer yellow hair; but it is too close to the skin color. In the end I had to choose what in my opinion was the better color scheme.
I am still in the process of painting this image as I write this post. I will update with my progress below.
Update on 10 Sep 2023
Having chosen the color scheme, next step was tidying up the colors. It has the side effect of defining area selections to help with painting. I do not always take this step; sometimes I want to paint loosely.
 |
| Flat colors |
 |
| Add shadows |
 |
| Adjust lit area; add rim lighting; shift lighting color to green |
 |
| Paint background; add gradient between face (area of focus) & fist (foreground); paint eyes; paint light pass on hair & fist; darken fist |
 |
| Remove rim light on lip edge, replace with shadows; add darker shadow area; darken fist |
As final touches, I decided to darken the frame, background sky, and the foreground fist to emphasize the face. Further, I educed opacity of the lightning to reduce its prominence.
 |
| Final painting |
And so, we have the final painting. I hope this post gives you a better idea what it is like to order a commission from me. You can do so by going to Commission page on my website.


No comments:
Post a Comment